Home |
1.1b |
Deploy the vCenter Appliance
As an alternative to installing vCenter Server on a Windows machine, you can download and install the VMware vCenter Server Appliance. The vCenter Server
Appliance is a preconfigured Linux-based (SUSE Linux Enterprise Server - SLES 11) virtual machine optimized for running vCenter Server and associated services.
As the name implies, this is a VM appliance that provides many of the vCenter functions without requiring a Windows system.
- Microsoft SQL Server is not supported for the vCenter Server Appliance.
IBM DB2 is supported only for the embedded database provided with the vCenter Server Appliance. - The vCenter Server Appliance does not support Linked Mode configuration.
- The vCenter Server Appliance does not support IPv6.
The vCenter Server Appliance is supported only on ESX/ESXi 4.0 and 4.1 and ESXi 5.0
Prerequisite to deploying vCenter Server Appliance:
- Verify that vSphere Client is installed.
- Verify that you are running ESX version 4.x or ESXi version 4.x or later.
- Verify that you have at least 7GB of disk space. The maximum size required is 80GB.
Procedure for deploying vCenter Server Appliance:
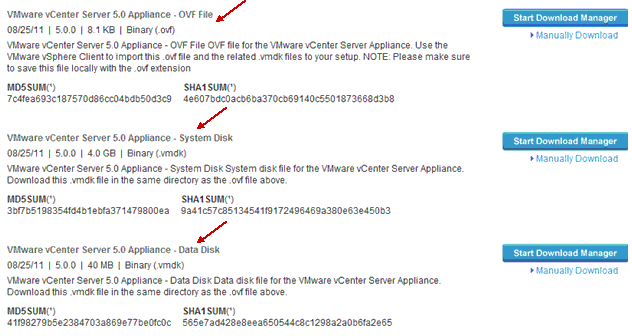
- Download the .VMDK and .OVF files for the vCenter Server appliance onto your system. Save the .VMDK and .OVF files in the same folder.
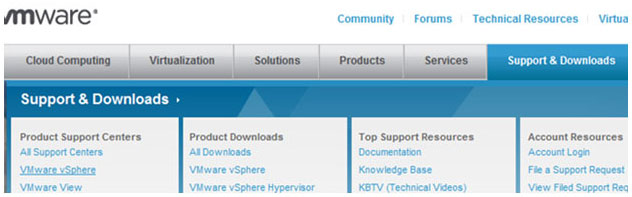
- Go to VMware.com
- Click Support & Downloads | VMware vSphere
 |
 |
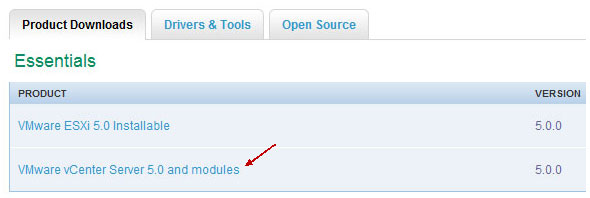
- Click VMware vCenter Server 5.0 and Modules
 |
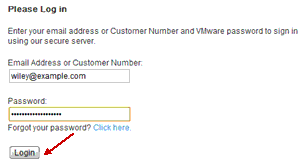
- Login
 |
- Click Download the management server
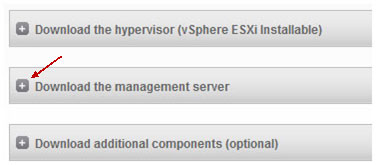 |
- Download the OVF, System Disk and Data Disk files.
 |
- Download and install the vSphere 5 client from the ESXi 5 host web splash page.
- Launch the client and connect directly to the ESXi 5 host.
- Select File > Deploy OVF Template and browse to the folder where you downloaded the vCenter 5 Appliance and select the OVF file.
- Follow the prompts in the Deploy OVF Template wizard to create the vCenter Server Appliance. You will be prompted for the name, storage and disk format. Use Thin provisioned format if you do not want to commit to using the maximum 80GB of disk space.
- Click Finish and the vCenter Server Appliance will deploy.
vCenter Server Appliance Configuration process
- Power on the vCenter Server Appliance and open the Console
(Using the arrow keys, select Configure Network and setup the networking) - Connect browser to https://<ip_address>:5480
Login as root : vmware
Accept EULA
Wait for services to start - Click the Network and Address tabs.
- Set a static IP Address, subnet mask and default gateway for the vCenter 5 Server Appliance
Click Save Settings - Select System and Time Zone
- Select Update and Settings
- Select Authentication and Active Directory
- Select vCenter Server and Database
Database options include embedded and Oracle
(No option for Microsoft SQL Server with vCenter 5 Server Appliance)
Change Database Type to embedded and click Test Settings
Click Save Settings when test completes - Click Status and Start vCenter
- When the settings are committed, click System | Reboot
Connecting to the vCenter Server Appliance
- Open the vSphere client and select the vCenter Server Appliance name/IP
Log in as root/vmware or the AD/NIS credentials configured previously - Or, open a browser to https://:9443/vsphere-client
References:
http://blog.edgoad.com/2011/10/vcp5-deploy-vcenter-appliance.html
http://pubs.vmware.com/vsphere-50/index.jsp?topic=/com.vmware.vsphere.install.doc_50/GUID-25FCBA87-5D2F-4CB6-85D7-88899B4AC174.html
http://www.sysadmintutorials.com/tutorials/vmware-vsphere-5-x/vcenter-5-x/appliance/installation/
VTSP5 Boot Camp
Home |
1.1b |
Obj 1.2 |